Part 1: Set up the Project
Introduction
Now that you have the necessary background knowledge and your development environment set up, you can get your local project running!
There are many ways to author a Gatsby plugin or more generally speaking an npm package. Since we don’t want you to be stuck in decision fatigue on how to do things, you’ll learn how to build a Gatsby source plugin in TypeScript with just tsc (that is the TypeScript compiler). Later you can decide to use other tooling if you wish. The repository you’ll clone will also show how to test your plugin in a Gatsby site.
By the end of this part of the tutorial, you will have:
- Cloned the companion repository to your local machine
- Explored the project structure
- Installed all required dependencies and built all packages
- Spun up the local development server
Clone the repository
Clone the companion repository from GitHub to your desired location. The repository’s main branch shows the finished state after following this tutorial. You can reference its code as an additional resource while going through this guide.
GitHub cloning instructions
HTTPS snippet:
SSH snippet:
Also be sure to check out GitHub’s documentation for how to clone a repository.
After successfully cloning the repository, navigate to its folder and switch to the start branch to have a clean boilerplate:
Open the repository in your favorite editor as it’ll make the next step easier.
Project structure
The creating-source-plugin-tutorial project includes three directories:
api: This is the example backend APIplugin: The source pluginsite: An example Gatsby site
The site uses the plugin which sources its data from api. As mentioned in Part 0 this project uses yarn workspaces to make this setup work.
By having the plugin and an example site that uses the plugin in the same repository, you can more easily test your plugin.
You can ignore the api folder unless you’re curious how a GraphQL Yoga server is set up. For the purpose of this tutorial the example backend API was included so that this tutorial doesn’t rely on outside resources. This way you can run everything locally.
The plugin itself has a structure we’d also recommend following:
- A
package.jsonfile that setsgatsbyandgatsby-pluginas its"keywords"so that Gatsby’s plugin search can pick it up - A root
gatsby-node.jsthat requires./dist/gatsby-node(the compiled TypeScript file). At the moment Gatsby looks for a rootgatsby-node.jsfile as its entry file. - A well-written
READMEthat explains to the user in concise steps how to install, use, and configure your plugin (also see How to write a plugin README) - A
srcfolder with the plugin’s source code- A root
gatsby-node.tsfile that exports Gatsby Node APIs from individual files - Individual files that only contain the specific Node API (in kebab case), e.g.
onPluginInitbecomeson-plugin-init.ts. This will also make unit testing your plugin easier.
- A root
How you organize your src folder is of course up to you, but we’d recommend keeping things consistent and files lowercase.
Wondering about a source plugin template for new projects?
Above we said that you can ignore the api folder. This is because for your real-world project you’ll most likely source the data from an external API, not an API locally in your repository.
The companion repository not only has a start branch but also a template branch without the api folder. You’ll learn more about this at the end in the What’s next? part. For now, go through the tutorial and at the end you’ll know how to leverage the repository as a template for your new projects!
Start the project
Ready to see something happen in your browser? Then let’s go!
First, install the necessary dependencies to run everything:
Afterwards, open a new window in your terminal (you should have two now).
In the first window, run the develop:deps script to start watching the api and plugin directories. If you change something inside api, the GraphQL server will be restarted, if you change something in plugin the TypeScript compiler will output updated files.
You should find something like this in your terminal:
Now, in your second terminal window, run the develop:site script. This runs gatsby develop for the example site:
While gatsby develop is running you should also note the info Example plugin loaded... log. This verifies that the plugin was successfully loaded for this initial demo. Yay 🎉
You’re running develop:site in a separate window so that you can restart the process independently of the develop:deps script. If you make a change to your plugin you’ll need to restart the example site.
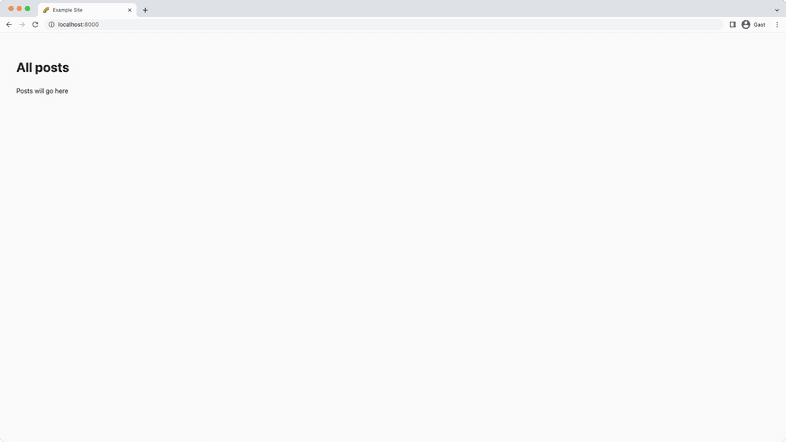
Once the development server is ready, go to http://localhost:8000, and be greeted by a minimalistic index page.
Key takeaways
- It’s good practice to develop your source plugin alongside an example site to be able to test it
- You can keep your code organized by placing each Gatsby Node API in its own file
- When making changes to your plugin, you’ll need to restart
gatsby developto see your changes applied
Share Your Feedback!
Our goal is for this tutorial to be helpful and easy to follow. We’d love to hear your feedback about what you liked or didn’t like about this part of the tutorial.
Use the “Was this doc helpful to you?” form at the bottom of this page to let us know what worked well and what we can improve.
What’s coming next?
In Part 2 you’ll learn how to do the most important part of a Gatsby source plugin: sourcing data and displaying it on your site.
Continue to Part 2