Configuring Log Drains on Gatsby Cloud
Introduction
Gatsby Cloud can deliver hosting logs to the 3rd party services (currently only DataDog), which allows developers and marketers to review server side analytics, and accelerate the troubleshooting process when hosting layer errors occur.
Prerequisites
- The Log Drains feature is limited to enterprise plans in Gatsby Cloud, therefore this feature will only appear within site settings for sites within enterprise plans.
- You must have an account with DataDog. Currently, Gatsby Cloud only supports integration with DataDog, but will introduce additional logging targets based on customer demand in the future.
Directions
Enable log drains
Log in to your DataDog account
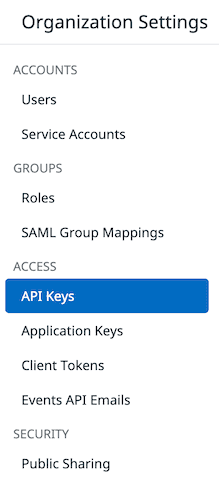
Add a new API Key, giving it a name that will help you remember that this key is used for receiving logs from Gatsby Cloud.
Notes:
Copy the newly-created
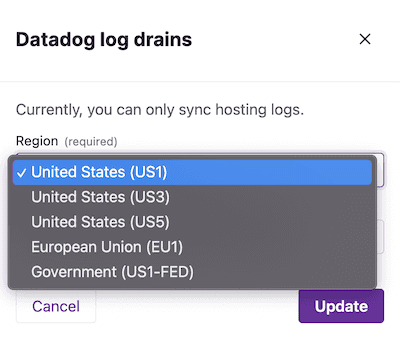
API KeyTake note of the region (“SITE” in DataDog terminology) for your DataDog account.
Note: Your DataDog region may appear as the subdomain when logged into DataDog
Log in to Gatsby Cloud
Select the site whose logs you’d like to integrate with DataDog
Access “Site Settings” for that site
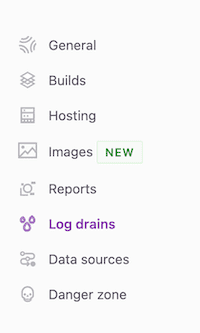
Select “Log Drains” in the left navigation

Note: If you do not see Log Drains, then the selected site is not likely within an enterprise plan. Contact us if you have any questions.
In DataDog, this is the value for Site
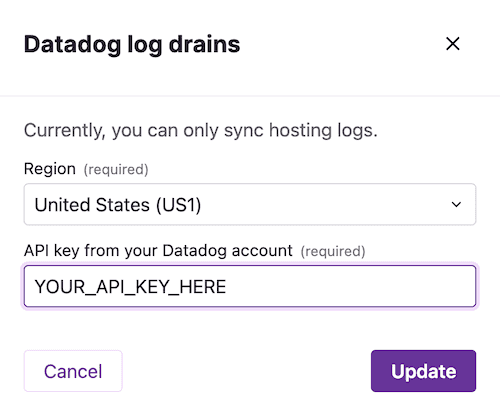
Click Connect
View the Live Tail for this Gatsby site’s logs in your DataDog account to confirm that you’re now receiving logs from Gatsby Cloud
Note: It can take up to 10 minutes for your initial set of logs to appear
Modify log drains
- Access your site’s “Site Settings” in Gatsby Cloud
- Navigate to “Log Drains” in the left-hand navigation
- Click the ellipsis for Log Drains to expose the actions menu
- Click Edit
- Update the settings accordingly
- Click Save
Disconnect log drains
- Access your site’s “Site Settings” in Gatsby Cloud
- Navigate to “Log Drains” in the left-hand navigation
- Click the ellipsis for Log Drains to expose the actions menu
- Click Delete
- Confirm Deletion of this configuration
- Confirm that you are no longer receiving logs for this site via Live Tail in DataDog
Troubleshooting
- After selecting the region and specifying my
API Key, I receive an error upon clicking Connect from Gatsby Cloud- Confirm that you’ve entered the DataDog
API Keyproperly - Confirm that you’ve selected the appropriate Region in Step 10
- If all of these are correct, please Contact us
- Confirm that you’ve entered the DataDog
- It’s been more than 10 minutes, and I still don’t see any logs in DataDog. What now?
- Confirm that the corresponding site in Gatsby Cloud has indeed received visitor traffic historically
- Visit the corresponding site in Gatsby Cloud yourself to ensure activities within the next drain interval and wait another 10 minutes to confirm events via Live Tail
- If you still see no traffic in DataDog Live Tail, please Contact us


