Cheat Sheet
The Gatsby team has created a resource that you might find useful when building a Gatsby site: a cheat sheet with all the top commands and development tips! Feel free to download and print yourself a copy (and tape it by your workstation!). For related online information, visit Quick Start and Commands (Gatsby CLI).
Get the PDF: gatsby-cheat-sheet.pdf
Page 1
Page 2
Gatsby Cheat Sheet contents
v1.0 for Gatsby 2.xLatest version
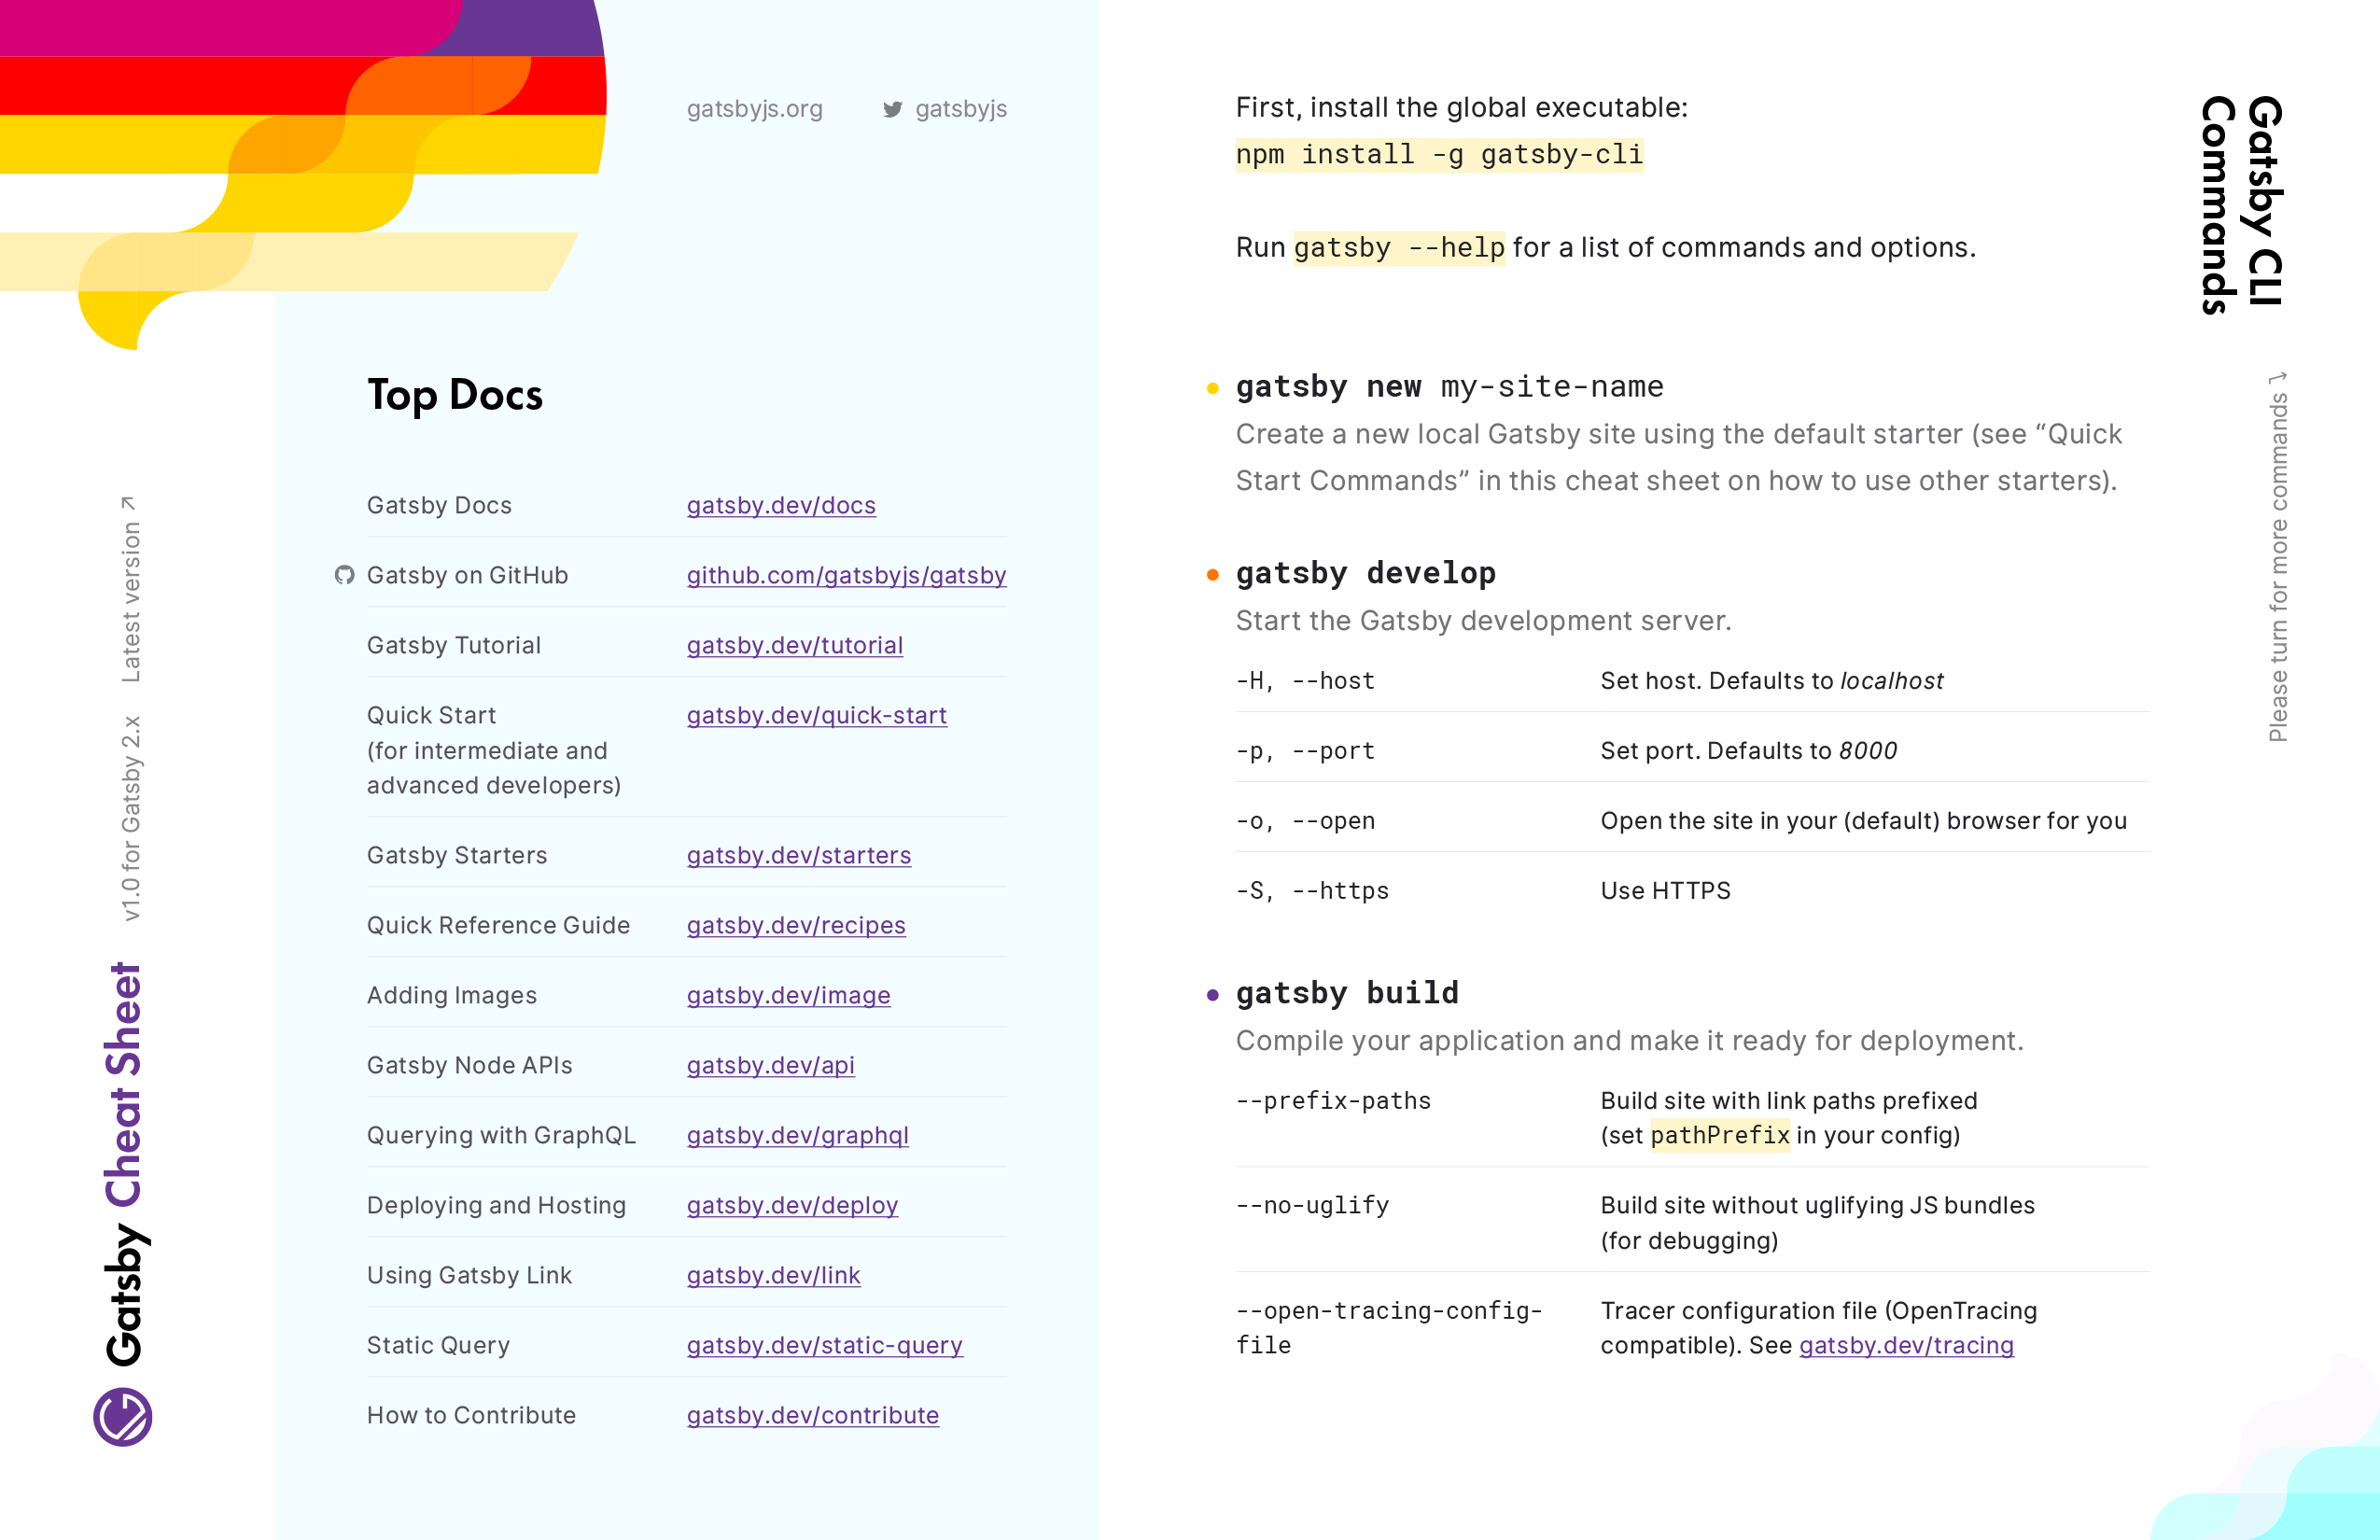
Top Docs
Gatsby Docs | |
Gatsby on GitHub | |
Gatsby Tutorial | |
Quick Start | |
Gatsby Starters | |
Adding Images | |
Gatsby Node APIs | |
Querying with GraphQL | |
Deploying and Hosting | |
Using Gatsby Link | |
Static Query | |
How to Contribute |
Gatsby CLI Commands
First, install the global executable:npm install -g gatsby-cli
Run gatsby --help for a list of commands and options.
gatsby new my-site-name
Create a new local Gatsby site using the default starter (see “Quick Start Commands” in this cheat sheet on how to use other starters).
gatsby develop
Start the Gatsby development server.
| Set host. Defaults to |
| Set port. Defaults to env.PORT or |
| Open the site in your (default) browser for you |
| Use HTTPS |
gatsby build
Compile your application and make it ready for deployment.
| Build site with link paths prefixed |
| Build site without uglifying JS bundles |
| Tracer configuration file (OpenTracing compatible). See gatsby.dev/tracing |
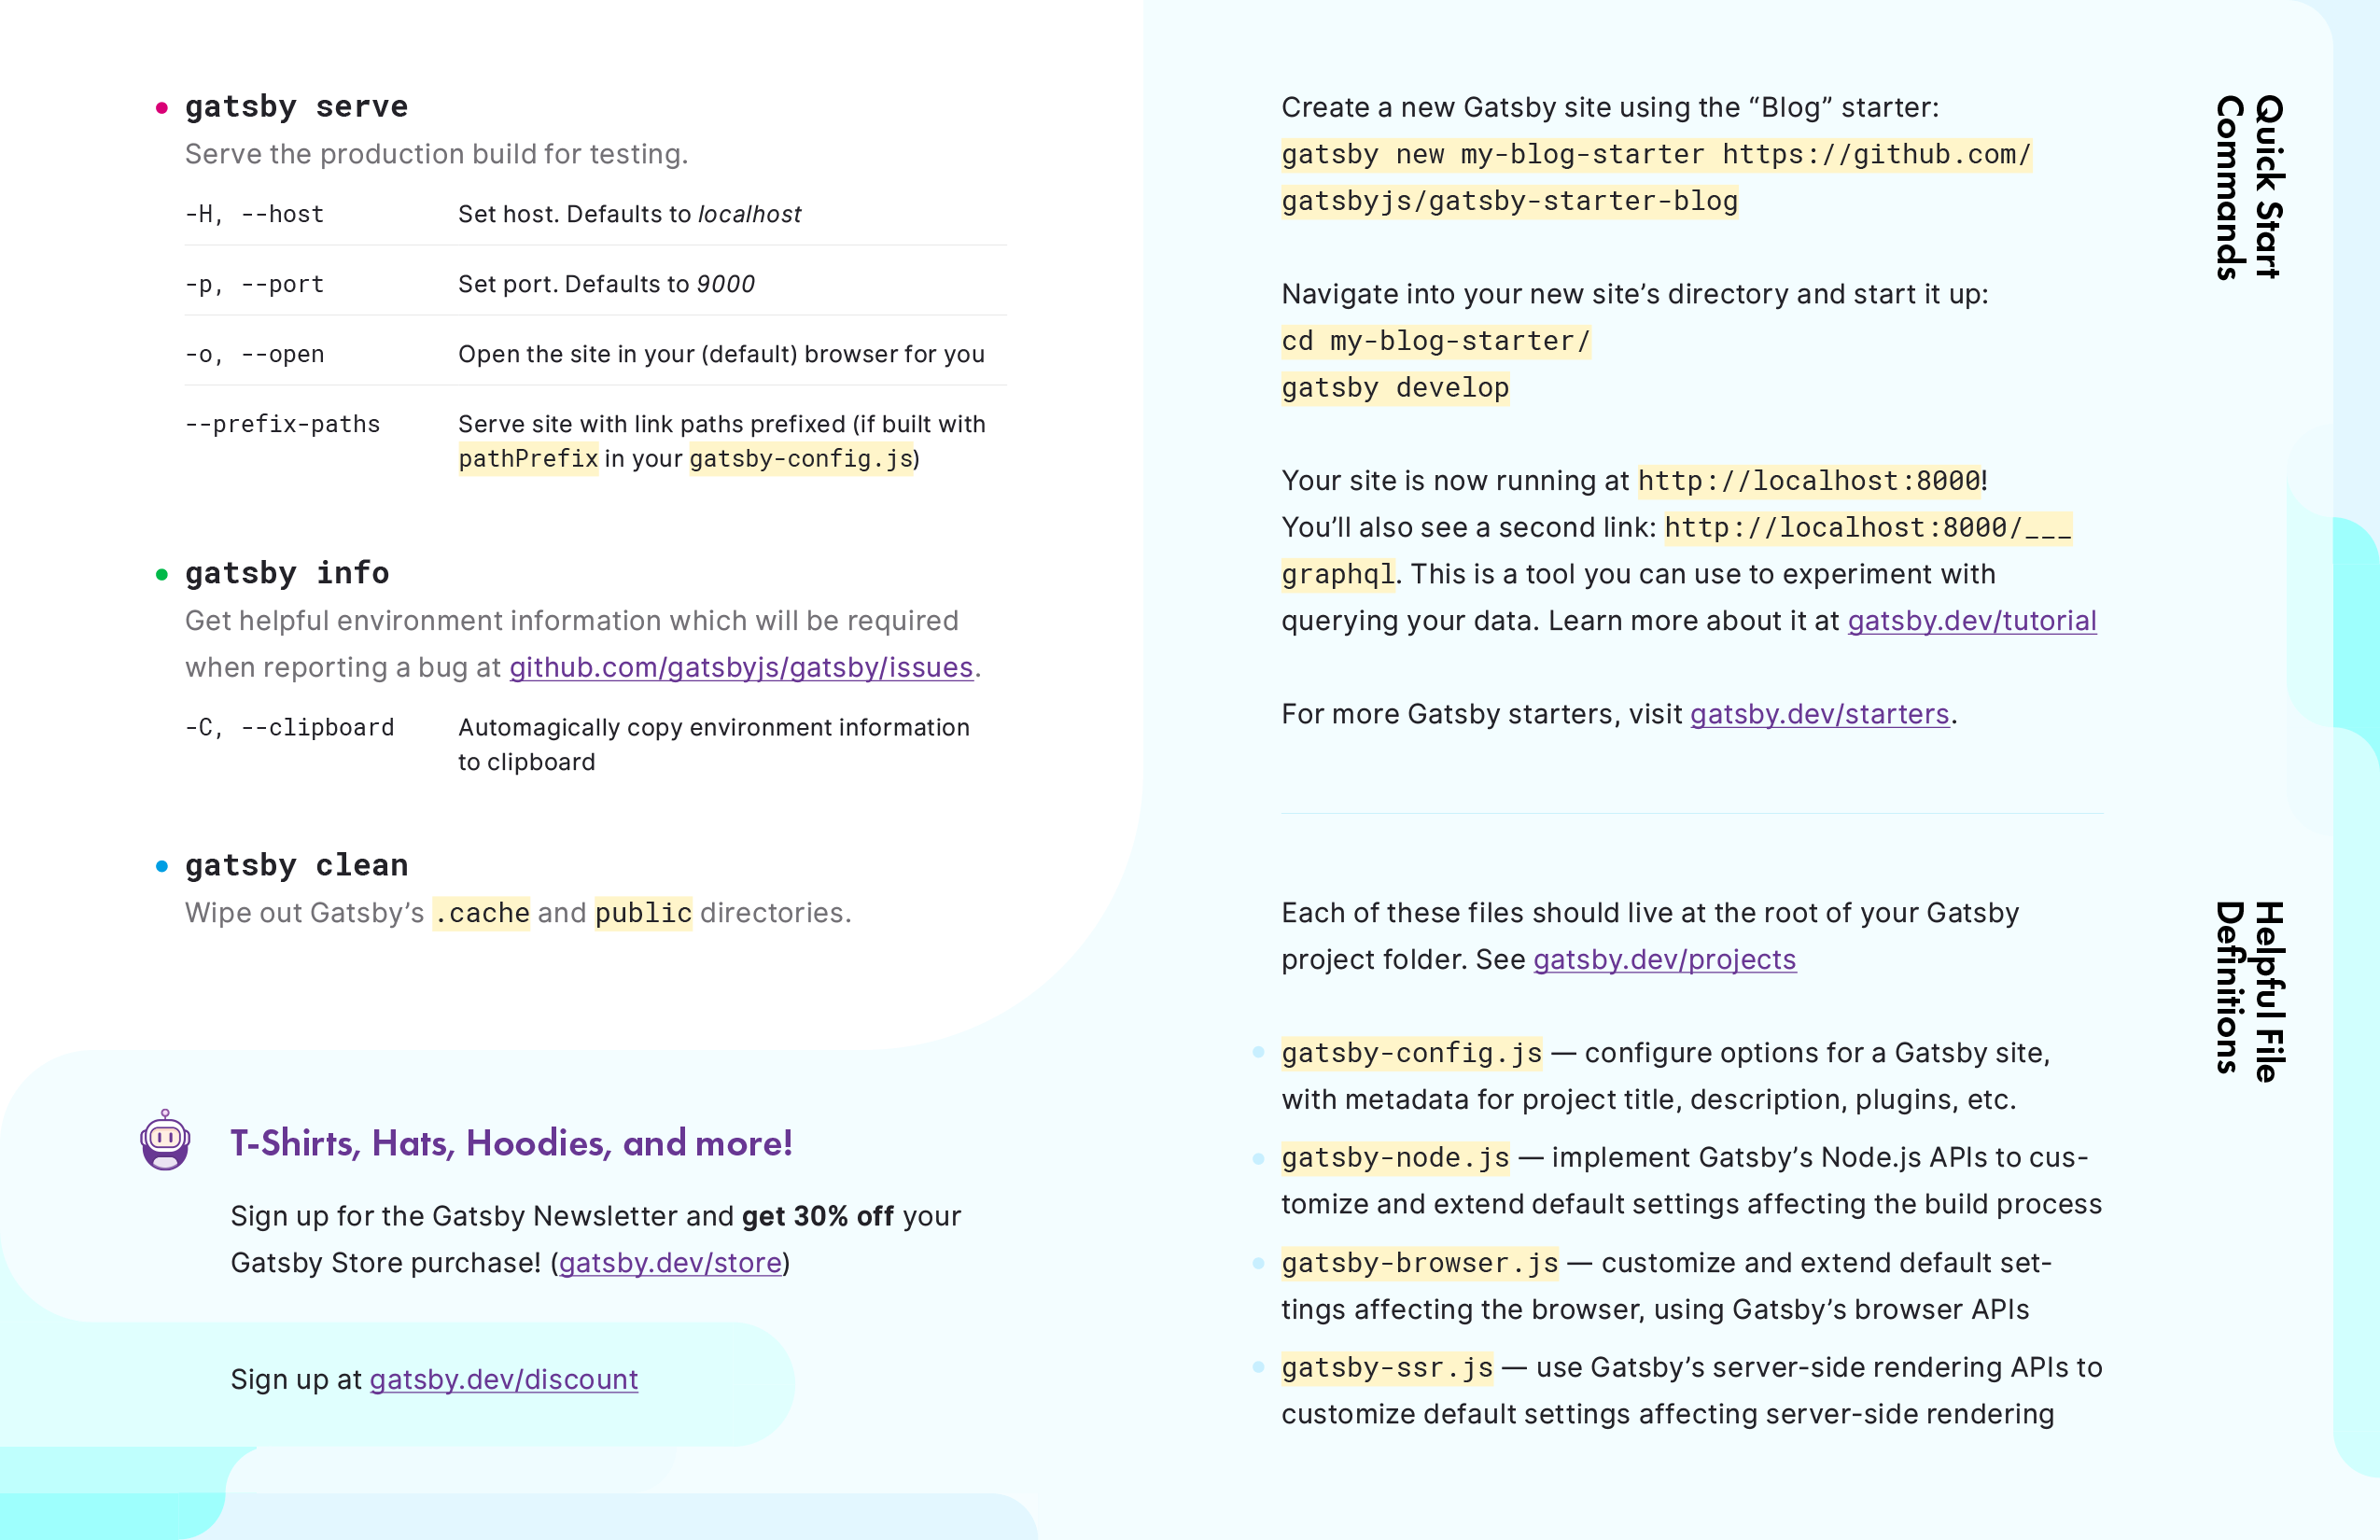
gatsby serve
Serve the production build for testing.
| Set host. Defaults to |
| Set port. Defaults to |
| Open the site in your (default) browser for you |
| Serve site with link paths prefixed (if built with |
gatsby info
Get helpful environment information which will be required when reporting a bug at github.com/gatsbyjs/gatsby/issues.
| Automagically copy environment information to clipboard |
gatsby clean
Wipe out Gatsby’s .cache and public directories.
T-Shirts, Hats, Hoodies, and more!
Sign up for the Gatsby Newsletter and get 30% off your Gatsby Store purchase! (gatsby.dev/store)
Sign up at gatsby.dev/discount
Quick Start Commands
Create a new Gatsby site using the “Blog” starter:gatsby new my-blog-starter https://github.com/gatsbyjs/gatsby-starter-blog
Navigate into your new site’s directory and start it up:cd my-blog-starter/
gatsby develop
Your site is now running at http://localhost:8000!
You’ll also see a second link: http://localhost:8000/___graphql. This is a tool you can use to experiment with querying your data. Learn more about it at gatsby.dev/tutorial
For more Gatsby starters, visit gatsby.dev/starters.
Helpful File Definitions
Each of these files should live at the root of your Gatsby project folder. See gatsby.dev/projects
gatsby-config.js — configure options for a Gatsby site, with metadata for project title, description, plugins, etc.
gatsby-node.js — implement Gatsby’s Node.js APIs to customize and extend default settings affecting the build process
gatsby-browser.js — customize and extend default settings affecting the browser, using Gatsby’s browser APIs
gatsby-ssr.js — use Gatsby’s server-side rendering APIs to customize default settings affecting server-side rendering